Give an industrial touch to your home along with maximizing the storage space by DIY an Industrial Pipe Shelving using this article!
I know, it’s been months since we finished our bedroom makeover! Life has changed very drastically, so please forgive me that it took me this long to share the DIY Industrial Pipe Shelving with you! But you are here, and that’s good!
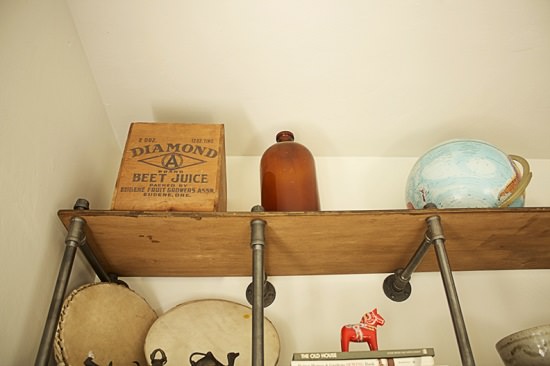
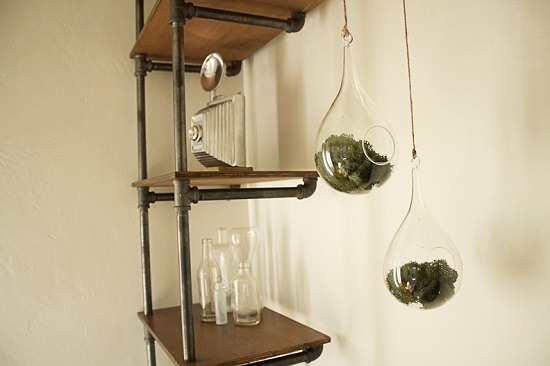
I am in love with this industrial shelving we created as a wall unit/closet! It really pops with the white walls, and we are even in the process of designing another wall unit for our living area. It has a unique look you just won’t find anywhere else.
DIY Industrial Pipe Shelving
Supplies
- Plywood
- Stain (optional)
- Various 1/2″ threaded black steel pipes and fittings
- Drywall screws
- Orange hand cleaner
- Sand Paper
- Tack cloth
- Table Saw
- Drill and 7/8″ spade drill bit
- *nipples: set lengths of pre-threaded 1/2″ pipe
This project is pretty straightforward – you will just have to be doing a lot of measuring and pre-planning. Come up with a design that you want for your wall unit. It doesn’t have to be exactly like what we have done. You can build your shelving around the bed and add a closet as well. Draw a rough draft of what you are wanting and measure, measure, measure. Once you have all your measurements, you will want to decide how long and deep you would like your shelves so you can plan out how much plywood and piping to buy as well as where you will need to cut your plywood. You will need an assortment of 1/2″ nipple lengths, tees, 90-degree elbows, caps, and floor flanges. Get yours online, which will save you a whole lot of money! We wanted a few short shelves on the side of the bed, but longer shelves above the bed. It can be a huge headache at times, so don’t be discouraged if you find yourself scratching your head once in a while. It will come together.
Once you get all your pieces for the shelving, cut the wood according to the measurements you made. Sand the wood, clean it off and stain it (which is optional). Any nipples over 12″ have a greasy black film on them. It isn’t something you want since it can wreck clothing and other materials. Go for a palm sander and sand off the black exterior, take a rag with fast orange hand cleaner and clean off the pipes. Drill holes in the plywood for the piping to go through. Since these pipes will be mounting to the wall, the holes will need to be measured according to the studs in the wall. Starting at the bottom, screw together the fittings for the first level of shelving. This will be the only section of the shelving that will have floor flanges on the base. After the first level, you can put your first piece of plywood and then continue all the way to the top. The very top section will be anchored to the wall with a floor flange. It doesn’t sound easy, but once you get going, it’s not so bad.

Remember, if you ever have questions you can always email us! We have already had a few questions regarding this project and others. We would be happy to help and explain more if need be! We are thrilled with all that work – it sure paid off. Trust us, if it weren’t easy we would not be sharing this!
What do you think of this style of shelving? Would you ever be interested in pulling this off in your home?