Sometimes, a simple revamp makes a piece feel brand new and fresh. Read this article on the revamped vintage toolbox to know more!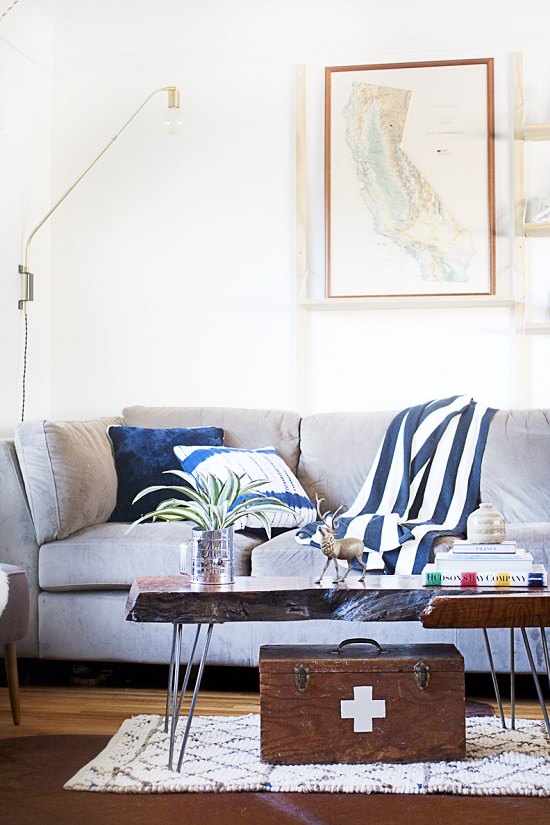
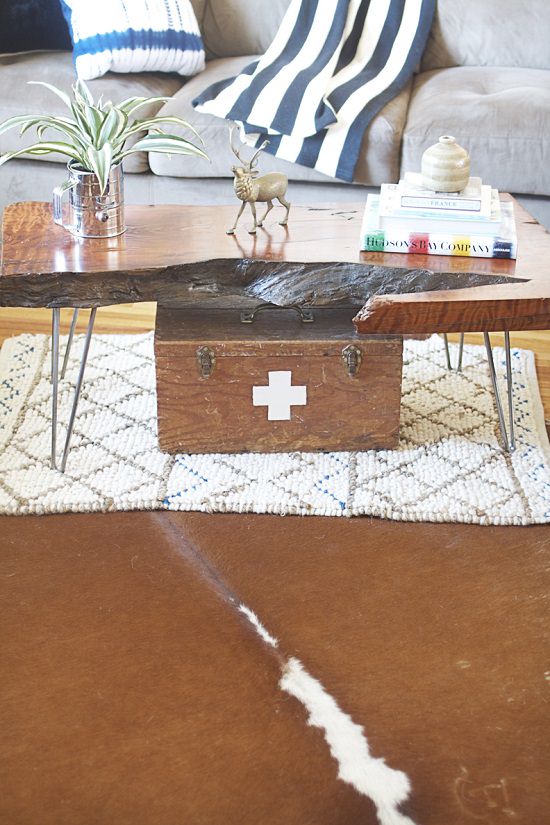
How often do we come across things that are old and rustic but we can’t just throw them away because of the emotional value they have for us. You’ll love to hear that you can totally transform those objects with minimal effort. Here is an idea to revamp a vintage toolbox that’ll give you the inspiration to do so! It is rough in shape, with old smeared paint, dings, and dents. But it needed a bit of a modern touch. It doesn’t have to be a huge makeover and after you are done revamping you’ll make the piece stand out a lot more than it did before!
Revamped Vintage Toolbox
Follow the below easy steps to give a vintage look to your plain old toolbox.
Materials
- Old Tool Box (or another piece if you prefer)
- Ruler
- Pencil
- PaintBrush
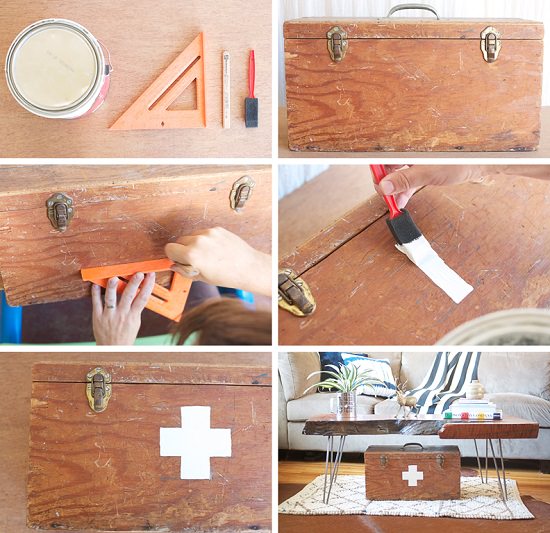
Directions
- Gather all the required supplies.
- Wipe the area clean that you intend to paint.
- Begin measuring your Swiss Cross using your pencil. (Remember: with a Swiss Cross design all sides are equal)
- Begin painting within your markings and outline.
- Continue step 4 until you have completely covered the inside of your outline and the paint is beautiful and even.
- Let dry and enjoy!
It’s pretty amazing how a simple symbol can change the look of an entire room. Restyling your space, a little suddenly makes the living area look a bit more organic and sophisticated! It’s an affordable way to update any room and flea markets are the best places to find those truly unique pieces! Not to mention, this is a great solution to hide and store all those toys that make their way into the living room.
Happy styling my friends!