Master the basic Macrame Knot in 5 Minutes with this Easy Guide. This simple step-by-step guide helps beginners in creating beautiful projects.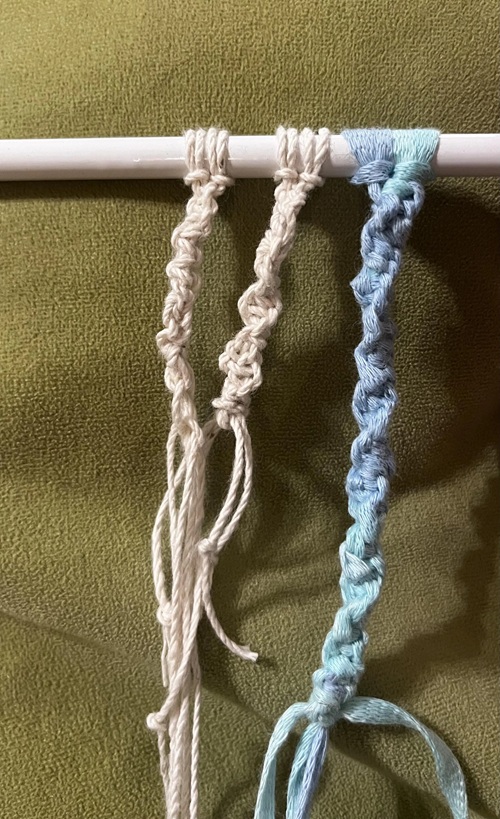
If you’re new to macrame, learning a few essential knots is the perfect place to begin. These knots don’t need many tools, just some cord, a base to attach it to, and a little patience.
5-Minute Easy Macrame Knots Step-by-Step Guide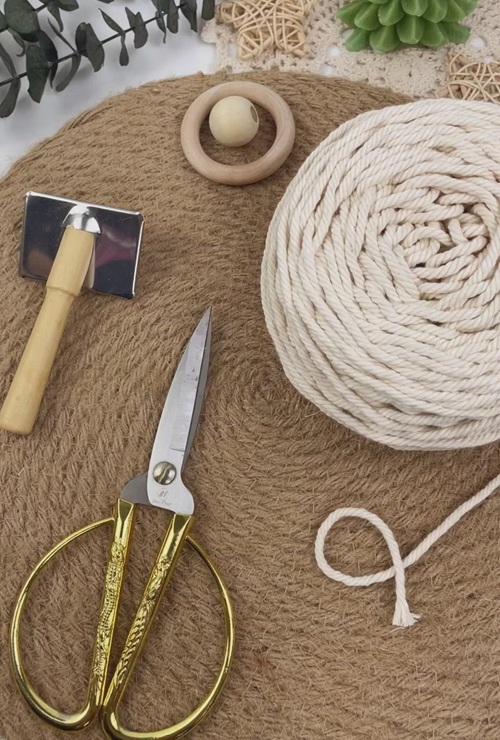
Macrame is all about using simple cord to create beautiful designs with a few knots-no needle & hook required! By tying different types of knots, you can create anything from a wall hanging to a plant hanger to a cute decor piece.
What You’ll Need
- Macrame cord
- Scissors
- Measuring tape
- Wooden dowel, metal ring, or stick
- Tape or macrame board
5-Minute Easy Macrame Knots
This quick guide will help you learn the basic knots of macrame step by step, building your confidence and helping you start creating beautiful handmade designs.
1. Lark’s Head Knot
The lark’s head knot is the very first knot that every newbie will use when they start their journey. This knot is used to attach cords to a dowel, ring, branch, or any other support. It creates a neat, symmetrical attachment and helps keep your cords evenly aligned.
You’ll often see it at the top of wall hangings, plant holders, curtains, and many other decorative macrame pieces.
How to Make the Lark’s Head Knot
- To make a loop, fold your cord in half.
- Put the loop under the ring, dowel, or rod.
- Then pull the two ends of the loose cords up and through the loop.
- Pull down until the knot is securely pressed on the support to tighten it.
2. Reverse Lark’s Head Knot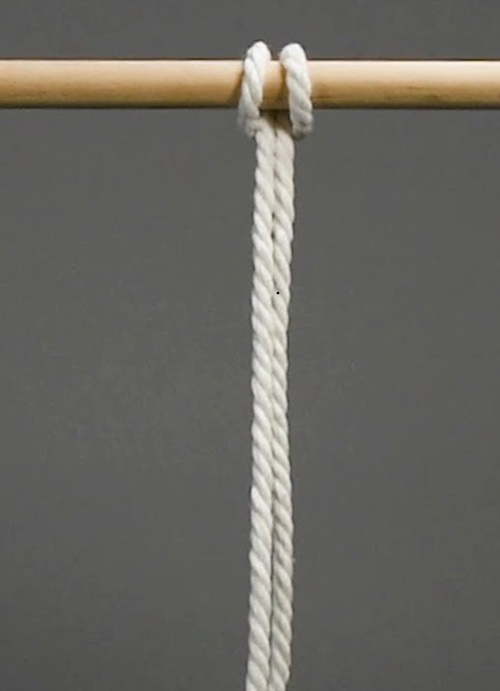
The reverse lark’s head knot is the opposite of the standard lark’s head knot, which creates a different appearance in the front of your pattern. It is used to add symmetry, contrast, or a subtle style variation in projects.
How to Tie the Reverse Lark’s Head Knot
- Start with your cords ready to knot.
- Take the folded end and place it under your stick or holding cord.
- Bring the two ends over your holding cord and under the folded edge. Pull through tightly.
3. Half Knot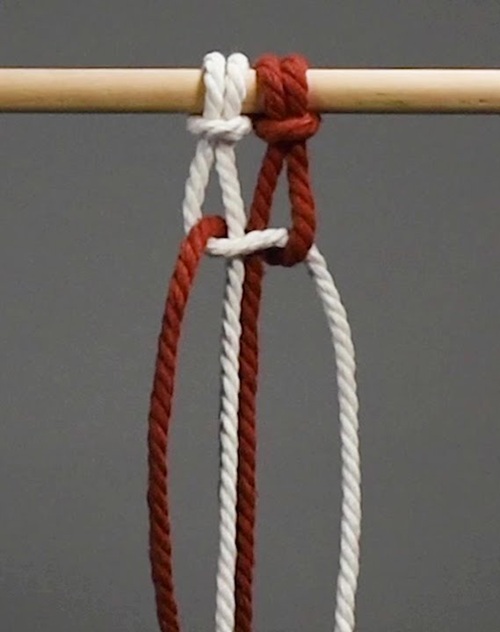
Many patterns begin with the half knot. When worked repeatedly in the same direction, it naturally twists into a beautiful spiral, creating a movement and flow in your design.
And this knot is commonly used in plant hangers, necklaces, belts, and statement pieces where texture and depth really stand out.
How to Tie the Half Knot
-
- Start with four cables: the two center cords & the two outer cords.
- Under the right working cord and over the center cords, cross the left working cord.
- Bring the right working cord under the center cords and up over the left working cord.
- To tighten the knot, pull both working cords equally.
- Repeat these same steps from the same side to form a spiral pattern.
4. Square Knot
A Square Knot is created by tying two half-knots in opposite directions. It is one of the most popular knots in macrame because of its strength and attractive appearance.
You’ll often see it in bracelets, belts, wall hangings, plant hangers, and decorative panels, where both durability and visual balance are important.
How to Tie the Square Knot
- Tie the first half knot starting from the left side.
- Tie a second half knot starting from the right side.
-
Pull both working cords evenly to tighten and square off the knot.
5. Half Hitch Knot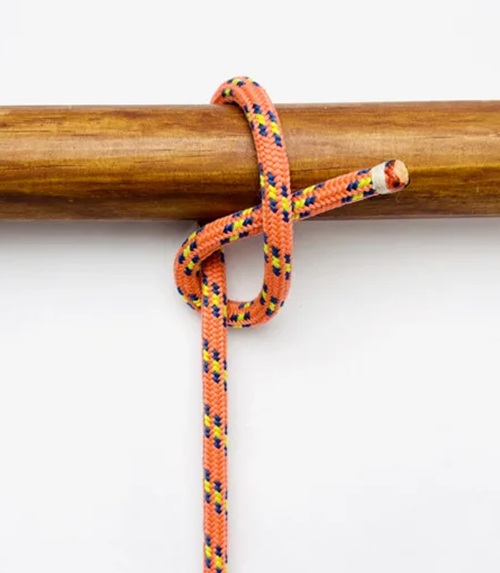
The half hitch knot is one of the most useful knots in macrame. It can be worked horizontally, vertically, or diagonally, which makes it perfect for creating borders, outlines, and detailed designs within a project.
When this knot is repeated, it forms the double half hitch, which is used mainly for geometric patterns, lettering, and structured wall hangings.
How to Tie the Half Hitch Knot
- Choose one cord to act as the anchor cord. This cord remains mostly still.
- Take a working cord and wrap it over and under the anchor cord, then pull it through the loop.
- Gently tighten the knot so it sits neatly against the anchor cord.
6. Overhand Knot
Overhand knot is the simplest knot in macrame, yet it plays an essential role in finishing projects. It is commonly used to secure cord ends and help prevent fraying, making your work last longer and look more polished.
You’ll often see this knot at the ends of braids, plant hangers, tassels, and macrame jewelry
How to Tie the Overhand Knot
-
Cross the cord over itself to form a loop.
- Pass the cord end through the loop.
- Pull tight and adjust as needed.
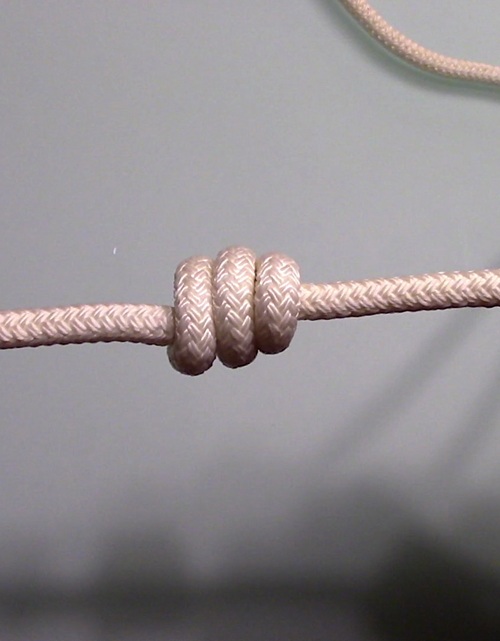
7. Wrap Knot (Gathering Knot)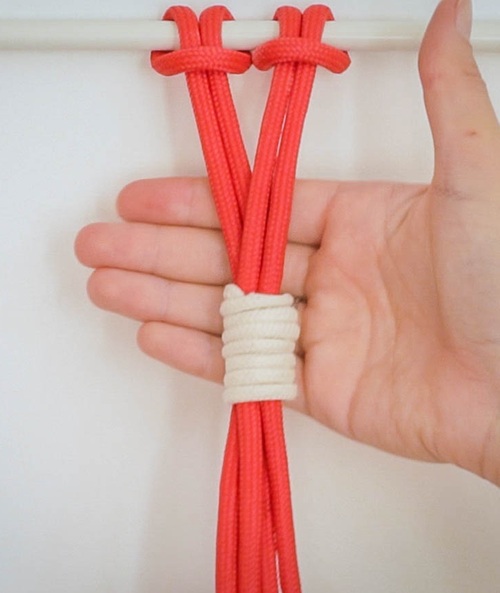
The gathering knot or the wrapping knot is used to neatly bundle multiple cords together for a clean and clean look. It is widely used at the top or bottom of plant hangers, bag handles, and wall hangings.
This knot not only secures the cords firmly but also adds an elegant decorative element to your project.
How to Tie the Gathering Knot
-
Cut a short piece of cord and fold it in half to form a loop.
-
Place the loop alongside the cords to be gathered, with the loop pointing upward.
-
Wrap the long end of the cord tightly around all the cords, moving upward.
-
Pass the wrapped end through the loop.
-
Pull the bottom tail to hide the loop neatly inside the wraps.
- Trim any excess cord for a tidy finish.
Common Beginner’s Mistakes & How to Fix Them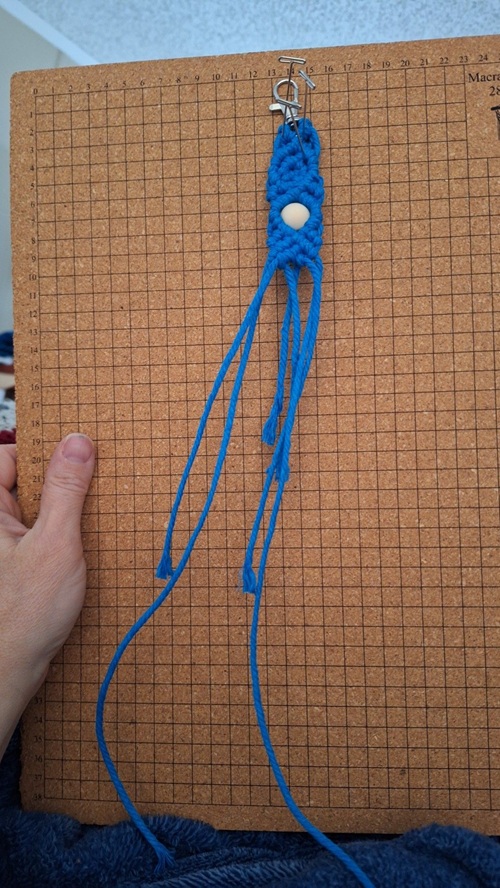
It’s very common to make a few small mistakes while learning new knots and techniques. But by understanding them and how to fix them, you can improve your knotting skills.
-
Uneven Knot Tension
Some knots might look loose or too tight, making the pattern look uneven. So, you can either start slowly and adjust the knot before tightening it fully, or maintain consistent tension.
-
Cutting Cords Too Short
If you are a newbie, then underestimating the cord length can be a major issue. All you need to do is cut the cord a little longer than you think you’ll need.
-
Skipping Practice
Trying to start a big project before practicing the basic knots. It’s suggested that you practice a few knots with scrap cords before starting your project.
-
Twisted or Tangled Cords
While knotting, the cord can twist or get tangled with other cords. Remember, before tightening the knot, gently straighten the cord and let it hang freely.