As an Amazon Associate, we earn a small commission from qualifying purchases — at no extra cost to you.
Bring the touch of nature indoors by adorning your home with beautiful living wall art. Learn how to make a living wall art below!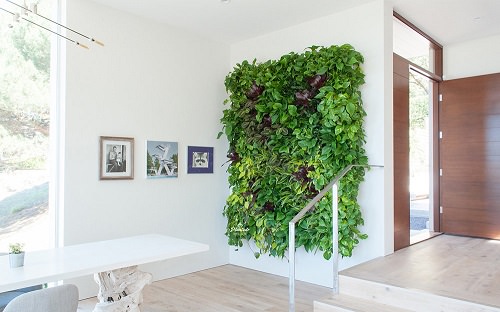
Living wall art or green wall is mounted on the interior or exterior walls of buildings and comes in various sizes and shapes. As it offers all the benefits of nature indoors in the smallest of spaces, the green wall has become quite popular nowadays. While living wall is usually found in hotels, shopping centers, and corporate offices, it’s a viable option for people living in small spaces too.
How to Make Living Wall Art?
Adding a living wall to your home or apartment not only enhances the overall look but also improves the air quality of your space. Before starting the project, it’s vital to consider the below point.
Determining the Right Wall
Start your living wall art project by choosing a wall. While deciding the wall, consider the weight load of your living wall art and how much sunlight it gets throughout the day. A wall receiving natural light is best, whether it comes from a nearby window or skylight. In the case of low direct sunlight, you can opt for plants such as philodendrons and pothos, which require less light.
DIY Living Wall Art
Supplies
- Shipping Pallet
- Hammer
- Nails
- Thin wood or plastic (roughly the size of the back of the pallet)
- Landscaping Fabric
- Plastic Sheeting
- Staple Gun
- Indoor Potting Soil
- Miscellaneous Plants (Smaller is better)
- 3-inch Eyehooks
- Heavy Weight-Bearing Metal Chain
Directions
- Step 1: First, grab a shipping pallet. Then, take off the slats from the top of the pallet. This step takes a little bit of your time.
- Step 2: Close the back of the pallet with a thin piece of wood and secure it with nails. Next, wrap the entire back of the pallet again with a plastic sheet and bind it using a staple gun. This preserves your living wall from moisture.
- Step 3: Now, measure and decide the spots on the pallet to assemble the slats. Make sure to leave 2.5 inches gap between each slat to make planting easier. Mark with a pen or pencil on the pallet, where each slat will go but don’t nail them down yet.
- Step 4: Next, create dirt pockets. With the help of landscaping fabrics, build a pocket on the underside of each slat. For this, cut a strip of landscaping fabric, double it up, and secure it with the staple gun to the back of one slat. Then, put the slat down, where you made pencil marks, and staple the other side of the landscaping fabric to the pallet. Redo for each section. Keep in mind, the pockets must be deep enough to hold sufficient soil. Now, nail down the slats properly.
- Step 5: Add potting soil in the prepared pockets and start planting your favorite plants. While doing this step, it’s highly recommended to lean the pallet against the wall.
Note: Don’t overload the pockets. Make sure the soil only comes up to the top of each slat. Place roots of the miscellaneous plants into the soil on an angle and pack them in tightly.
Your living wall art is ready. Now, hang the pallet on the wall with two eyehooks (3-inches) and a metal chain.
How To Care for the Living Wall?
The living wall requires continuous care and maintenance to thrive. Fertilization, irrigation, and overall care mostly depend on the type of living wall installed and plants growing there. Follow the below caring tips that will surely help you out.
- If your living wall has no built-in irrigation system, then hand water it with a watering can.
- Water your living wall several times a day (as per your plant need) because it contains a small amount of dirt that cannot handle a lot of water.
- Plants growing in-ground consumes nutrients from the soil without any issue. As living wall art contains a low amount of soil, you’ve to add nutrients manually in the form of fertilizers. Like watering, the specific amount, type, and frequency of fertilizer application depend on the plants growing on the wall.
- Prune dried leaves and stems from the plants when needed.
- If you are growing herbs, harvest them regularly, so they don’t become overgrown or rotten.
- Make sure to remove weeds from the living wall art.
Recommended Plants for the Living Wall
Plants selection plays a vital role in the design and functioning of vertical living wall art. To cut your hassle, we have compiled a list of plants below.
- Western Sword Fern – Requires indirect light, moist soil, and humidity.
- Blue Star Fern – Thrives well in little or partial direct sunlight. Water only when the potting soil dries out.
- Lipstick Plant – Needs bright indirect light, regular misting, and moderate watering.
- Pothos – Likes bright, not direct light, and erratic watering care.
- Peace Lily – Prefers light partial shade, regular misting, moist soil, and water once a week.
- Baby’s Tears – Loves bright filtered light and frequent watering.
- Rhipsalis – Thrives well in full sun, partial shade with moderate moisture.
Conclusion
After reading the above article, you’ll make your own living wall art in no time. If you have any suggestions or queries, please write in the comment section below. Enjoy!